

Table of Contents
- Step 1: Define the Custom Watch Movement Brief
- Step 2: Watch Movement CAD Design and Layout
- Step 3: Plates, Bridges, and Movement Architecture
- Step 4: Watch Movement Prototyping and Custom-Built Parts
- Step 5: Watch Movement Testing and Regulation
- How Long Does It Take to Develop a Watch Movement?
- Step 6: Finishing, Assembly, and Traceability
- Frequently Asked Questions
Last Updated: October 21, 2026
Step 1: Define the Custom Watch Movement Brief
Every serious custom watch movement starts with a written brief, not a sketch. The brief is the document that keeps a project honest when costs climb and deadlines slip.
A strong brief answers four questions before anyone opens CAD software:
- What is the movement for? A dress watch, a field watch, or a display-back piece each demand a different layout.
- What does it need to do? Time only, small seconds, a date, or a complication such as a power reserve indicator.
- What size must it fit? The case diameter sets the maximum movement diameter, and the case height sets the maximum thickness.
Write the brief in plain language. One page is enough. Ambiguity here becomes expensive later.
Architecture, Caliber Size, and Power Reserve Targets
The caliber is the movement's design identity: its diameter, thickness, layout, and winding system. Fix these numbers early, because changing them mid-project forces a full redesign of the plates.
Typical targets look like this:
| Specification | Common Target | Why It Matters |
|---|---|---|
| Movement diameter | 26-30 mm | Fits most mid-size cases |
| Movement thickness | 3.5-5.5 mm | Controls case height |
| Power reserve | 40-70 hours | Covers a weekend off the wrist |
| Frequency | 3-4 Hz | Balances accuracy and wear |
| Jewel count | 17-25 | Reduces friction at pivots |
Decide the winding system now: hand-wound keeps the movement thinner and simpler, while automatic winding adds a rotor, a reversing system, and thickness. Neither is better. They serve different watches.
Step 2: Watch Movement CAD Design and Layout
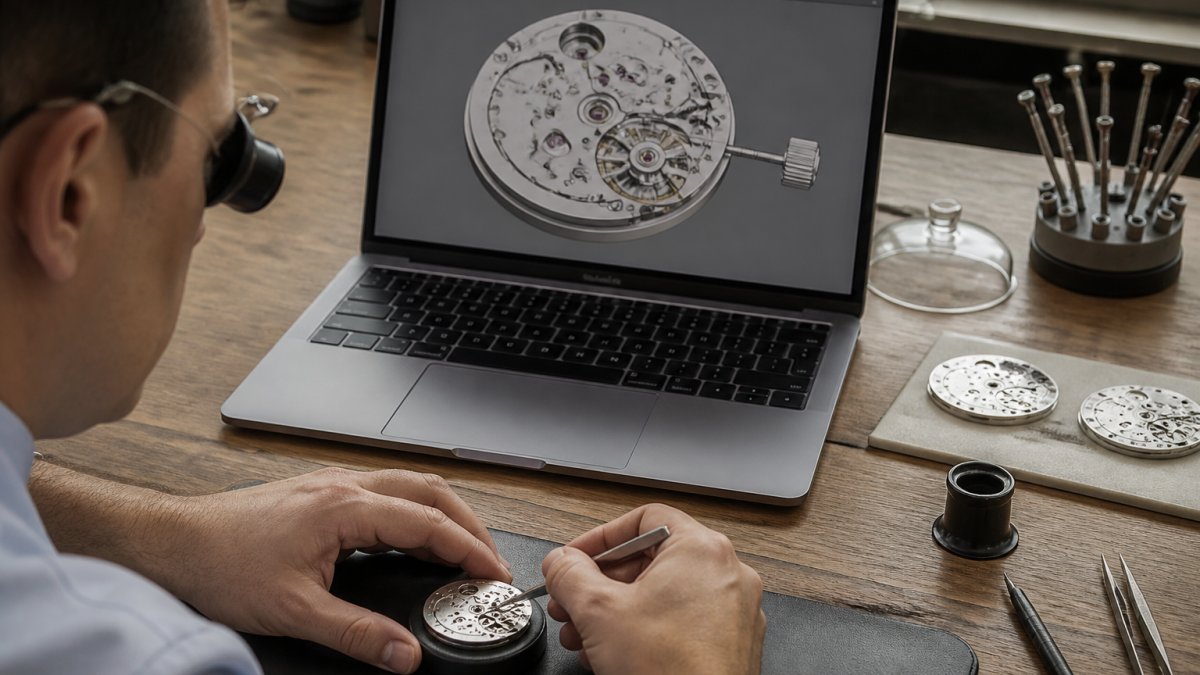
Watch movement CAD design turns the brief into geometry. Designers build the movement as a stack of layers: mainplate, barrel, gear train, escapement, balance, and bridges.
Modern watchmakers use parametric CAD so that changing one wheel diameter updates the whole train.
Gear Train, Escapement, and Balance Wheel Placement
The gear train carries energy from the mainspring to the escapement. Wheel and pinion sizes must be calculated, not guessed. A single tooth-count error throws off the entire timekeeping chain.
The escapement releases that energy in controlled pulses. Its position relative to the balance wheel matters enormously. Place the balance too close to a bridge and you create air turbulence that hurts rate stability.
Layout rules for watch movement CAD design often include:
- Keeping the balance wheel as far from the mainspring barrel as space allows, since the barrel is the largest source of magnetic and mechanical disturbance
- Routing the gear train in a clean arc so each wheel meshes with minimal friction and the train does not double back on itself
- Leaving room for regulation access without removing bridges
Simulation, Tolerance Analysis, and Design Validation
This is where a custom movement separates itself from a sketch. Before any part is cut, run three checks in CAD:
- Kinematic simulation. Animate the train and escapement to confirm every wheel rotates freely, the pallet fork locks and unlocks, and nothing interferes through a full revolution. Most CAD packages can flag collisions automatically.
- Tolerance stack analysis. Every dimension has a tolerance, and tolerances accumulate. A stack-up on the barrel arbor, train bridge, and mainplate can turn a nominal 0.02 mm endshake into a bind or a rattle. Model worst-case and nominal stacks for every critical interface, pivots in jewels, wheels under bridges, and the balance in its cock.
- Torque and power-flow modeling. Simple spreadsheet models of the train can estimate torque at each wheel and confirm the mainspring can drive the escapement through the full power reserve, including the low-torque end of the wind. Dedicated horology simulation tools exist, but a disciplined spreadsheet catches most gross errors.
Document every simulation result alongside the drawing. When a prototype later fails, the record tells you whether the design was wrong or the part was out of tolerance, a distinction that saves weeks of guessing. Refining these documentation standards becomes even more critical when you move to fabricate prototype mechanical parts to ensure that physical testing aligns precisely with your initial digital projections.
Step 3: Plates, Bridges, and Movement Architecture
Movement architecture is the visible skeleton of the caliber. The mainplate holds every pivot. The bridges hold the upper ends and define what the owner sees through a display back.
Three classic layouts dominate:
- Full plate: one large plate covers most of the movement. Strong, traditional, harder to service.
- Three-quarter plate: covers roughly three quarters, leaving the balance exposed. A German watchmaking signature.
- Full bridge: individual bridges for each function. Easiest to service and the most visually open.
Your choice changes cost, serviceability, and aesthetics at once. Full bridge designs cost more to machine but look spectacular. Full plate designs are cheaper to produce and hide more of the mechanism.
Step 4: Watch Movement Prototyping and Custom-Built Parts
Watch movement prototyping moves the design from screen to metal. Most projects run two rounds: a rough prototype to test fit, then a refined prototype to test function. The gap most projects fall into is treating prototyping as a single event rather than a measured sequence with pass/fail criteria at each stage.
Fabrication Methods and What Each One Is Good For
Custom-built parts usually start as machined brass or steel blanks, but the right process depends on the part:
- CNC milling and turning suit plates, bridges, and most structural parts. Setup cost dominates, so small quantities are expensive per part but the process is fast and repeatable.
- Wire EDM cuts hardened steel and complex internal profiles, escape wheels, pallet forks, and intricate bridge shapes, that milling cannot reach cleanly.
- Photochemical etching and stamping become economical at higher volumes for flat parts such as levers and springs, but tooling cost makes them impractical for a one-off prototype.
Critical components such as the escape wheel and balance staff are often produced by specialists who cut them to tight tolerances. Sourcing those specialists early matters: a single vendor with a long queue can set the project schedule.
Supplier Realities: Minimums, Lead Times, and Cost Drivers
A custom movement is a supply-chain project as much as an engineering one. Expect these patterns:
- Minimum order quantities. Prototype runs are often quoted at one to five pieces; production runs may require 25 to 100 pieces per component before unit pricing becomes sensible. Ask for both quotes at the same time so you can see the step.
- Lead times. Simple machined parts commonly run four to eight weeks; specialist escapement components and hairsprings can run three to six months. Plan the critical path around the slowest part, not the fastest.
- Cost drivers. Setup and tooling, material grade, tolerance class, surface finish, and inspection requirements drive price far more than part size. Tightening a tolerance from 0.02 mm to 0.01 mm can multiply cost, so reserve tight tolerances for interfaces that actually need them.
Prototype Stages and Pass/Fail Criteria
Each stage catches problems the previous one could not. Skipping a stage to save time almost always costs more later.
- Fit check: do the plates, bridges, and wheels assemble without interference? Pass when every part seats by hand and every pivot enters its jewel without force.
- Function check: does the train run freely and does the escapement lock and unlock cleanly? Pass when the train spins down smoothly and the escapement gives a consistent, audible lock on every beat.
- Rate check: does the movement keep time within a workable window? Measure rate, amplitude, and beat error on a timegrapher in at least two positions before declaring the prototype functional.
- Wear check: do pivots and jewels survive extended running? Run the movement for a defined period, commonly several weeks, and re-measure amplitude and rate to catch slow wear or lubrication breakdown.
Record every measurement against the targets set in the brief. A prototype that "runs" but misses its amplitude or power-reserve target is not a pass; it is a design iteration waiting to happen. That discipline is what turns a one-off prototype into a caliber you can actually produce.
Step 5: Watch Movement Testing and Regulation
Watch movement testing and regulation decide whether the design becomes a reliable timepiece or a drawer ornament.
Testing happens across several positions. A movement that keeps perfect time dial-up may lose badly dial-down. Good practice measures rate in at least five positions and across a range of temperatures.
Key performance measures:
- Rate: seconds gained or lost per day
- Amplitude: how far the balance swings, a sign of healthy energy delivery
- Beat error: how evenly the tick and tock are spaced
Regulation continues until the movement holds a consistent rate. Only then does it earn a place in a finished watch.
How Long Does It Take to Develop a Watch Movement?
A custom watch movement typically takes 12 to 24 months from brief to production-ready caliber. Simple time-only designs sit at the shorter end. Complications, novel architectures, and first-time designs push toward the longer end.
The timeline breaks down roughly like this:
| Phase | Typical Duration |
|---|---|
| Brief and specification | 1-2 months |
| CAD design and layout | 2-4 months |
| Prototyping and iteration | 4-8 months |
| Testing and regulation | 2-4 months |
| Finishing, assembly, and documentation | 2-4 months |
First projects always run longer than planned. Machining errors, tolerance misses, and supplier delays are normal. Build slack into the schedule rather than pretending it will not happen.
Step 6: Finishing, Assembly, and Traceability
Finishing is where a movement becomes something worth looking at. Anglage, Côtes de Genève, perlage, and polished screw heads are not decoration for their own sake.
Assembly then follows a strict sequence: mainplate, train, escapement, balance, bridges, and finally regulation in the case. Each step is checked before the next begins.
Traceability means recording which parts went into which movement, who assembled it, and when it was regulated.
A custom watch movement is not a single clever idea. It is a chain of decisions, each one documented and tested before the next begins.
Frequently Asked Questions
What are the steps in designing a custom watch movement?
The process runs in seven stages: define the brief (caliber size, power reserve, frequency, complication set), complete the watch movement CAD design and layout, finalize plates and bridges, produce prototypes and custom-built parts, test and regulate the finished movement, apply finishing and assemble, then document traceability. Each stage feeds the next, and most makers loop back at least once after prototyping reveals interference, tolerance, or assembly problems that were not visible on screen.
What software is used for watch movement CAD design?
Most movement designers work in parametric 3D CAD such as SolidWorks, Siemens NX, or Fusion 360, because gear train geometry, tooth profiles, and bridge clearances need precise, editable models. Simulation tools check deflection and thermal expansion before any metal is cut. For the finishing and dial side, 2D vector software handles engraving and decoration artwork. Whatever package you choose, the deliverable is a full drawing set with tolerances that a machine shop can quote and cut from.
How long does it take to develop a watch movement?
A first custom caliber typically takes 18 to 36 months from brief to a production-ready movement, and a complicated or fully in-house design can run longer. CAD and layout consume several months, prototyping and iteration add more, and testing and regulation need weeks of positional runs before a movement is signed off. A modified existing caliber shortens the timeline considerably because the architecture, gear train, and escapement are already proven.
What is the difference between a custom watch movement and a modified movement?
A modified movement starts from an existing caliber and changes finishing, rotor engraving, or minor components. A custom watch movement is designed from the architecture up: its own plate layout, gear train, bridges, and balance assembly. The custom route allows unique proportions, skeletonization, and visual identity that a modified caliber cannot offer, but it demands full prototyping, testing, and regulation cycles, which is why the engineering cost and lead time are substantially higher.
Designing a caliber from scratch takes patience, precision, and a clear process from brief to finishing. If you would rather wear the result than build it, Haim Watch Company offers custom-designed calibers inside watches finished to a standard collectors notice. Our Legacy Automatic carries 100% US assembly and movement, hand-finished titanium cases, and ornate dial decoration that Worn & Wound called a trove of design. Explore the collection and find the piece that marks your own milestone.